There are free blog backgrounds all over the web, but kind of like
my custom header, I wanted something simple and clean to reflect the "look" I wanted on my blog. I wanted to make a soft, subtle, linen looking background, and found
this site that had exactly what I was looking for. Well, almost exactly. Once again, it seems like almost all the tutorials I found were for Photoshop, and since I wanted to use
Paint.net, I simply fumbled around, using the
Elixir Graphics tutorial as a guide.
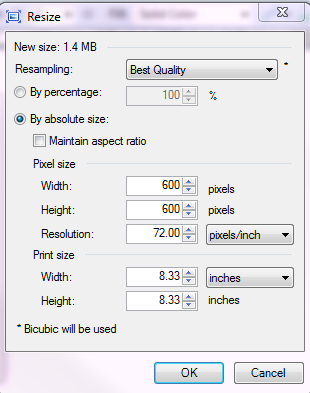
I first created a new Paint.net image, and resized my image (Image > Resize) to 600x600 pixels and a resolution of 72 pixels per inch.
Next, I added two more layers (Layers > Add New Layer), and renamed my new layers "Horizontal" and "Vertical". I then selected a base color for my background, selected the fill tool, and made
all three layers a solid gray.
Now it's time to add the cross hatch pattern. Starting on the Horizontal layer, add Noise (Effects > Noise > Add Noise). On the Horizontal layer, I did an Intensity of 65, with Color Saturation and Coverage set to 100. I did the same settings on the Vertical layer, except did an Intensity of 70.
Next I changed my Opacity to 30 (32 for the Vertical layer) and Blending Mode to Multiply on the Horizontal and Vertical layers by double clicking on the layer in the Layers tool box.
It's finally time to add the cross hatch. This is done by adding a Motion Blur (Effects > Blurs > Motion Blur) to the Horizontal and Vertical layers. For the Horizontal layer, the Angle should be set to 0. For the Vertical layer, the Angle should be set to 90.
And there you have it! You can play around with the Background Color and the Opacity on the layers to adjust how much cross hatch you can see, but I kept mine low because I wanted a subtle linen look. Once you have it how you want it, save it as a .jpg and upload it as your
Background Image!


No comments:
Post a Comment